Coin Register IOT for Vending Machine
Introduction
Just a few years ago, building a product prototype was both expensive and complex, especially with plastic injection molding. Today, with the progress of industrial 3D printing, almost any product can be created and tested at a fraction of the cost. This shift has been driven by the ability to manufacture components using industrial-grade 3D printing.
3D printing has redefined the way we conceive and personalize parts for electronic projects, making it possible to produce intricate components with accuracy and efficiency.
In this article, we explore how 3D printing was pivotal in creating a coin collector specifically for vending machines. The enclosure for this device — which holds a coin acceptor, an LCD screen, and a control board — was entirely crafted and produced through 3D modeling and printing.
This method not only guaranteed a precise fit for all electronic parts but also allowed for a customized, practical design that aligned with the unique requirements of the project.

Amid technological advancements and the demand for tailored solutions, industrial 3D printing emerges as a valuable resource for engineers and electronics enthusiasts aiming for high-quality prototypes with rapid production times.
Now... Let get started our project!
3D Modeling and 3D Printing
The initial phase of product development or prototyping consists of two main parts: designing the project in a 3D modeling tool and modifying the design for 3D printing in accordance with the specific rules of 3D manufacturing processes.
3D Modeling Stage
3D modeling is a crucial stage in the production workflow for any product. This is where structural planning takes place, the proper materials are chosen, and various simulation tests are conducted to guarantee that the parts will be manufactured both safely and with high quality.
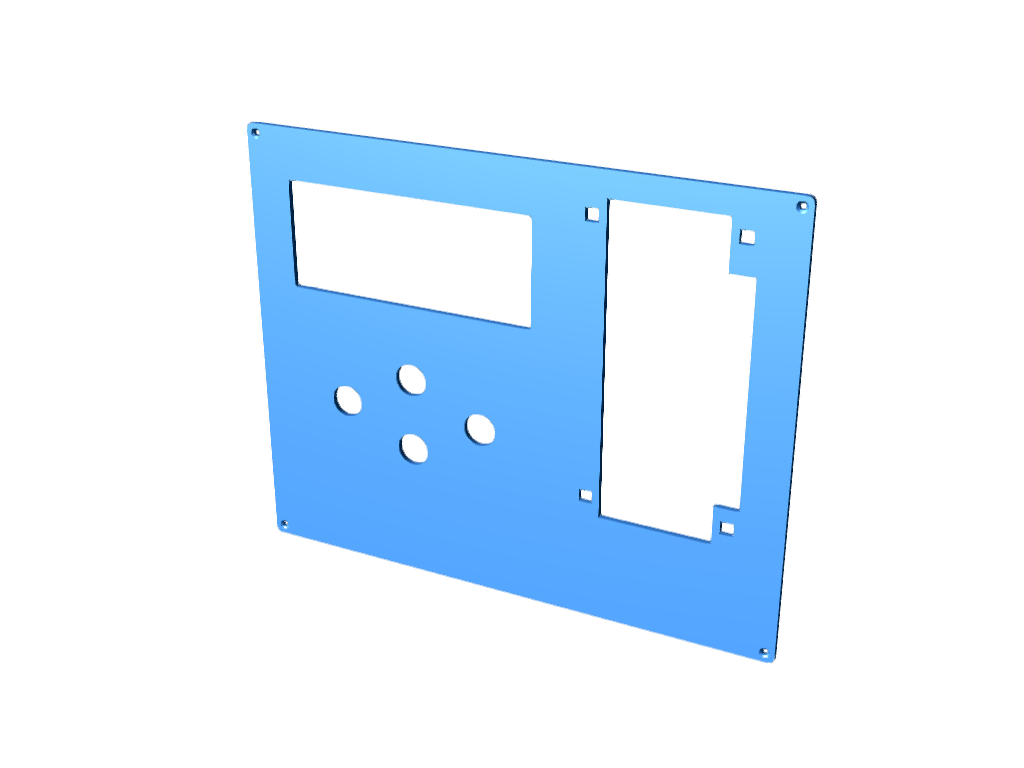
Presented below is the device, as illustrated in the 3D model.

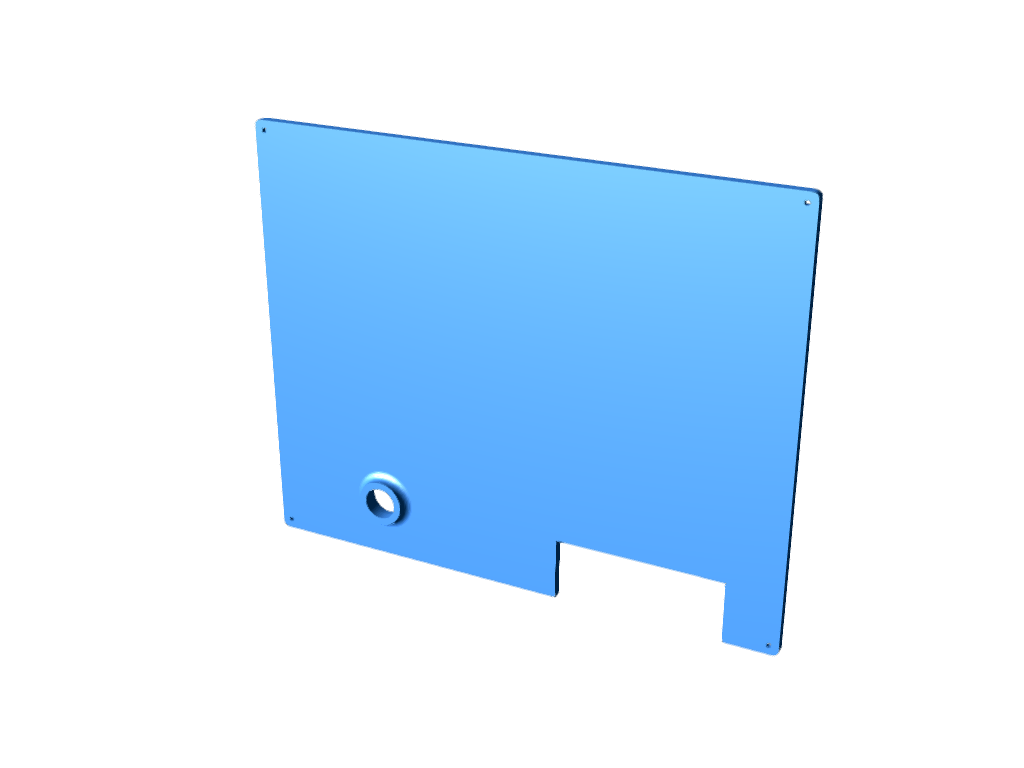
The device’s structure includes four general-purpose buttons, an LCD display for displaying information, and a coin acceptor. On the rear side, there is a power connector and an access drawer for collecting coins.
As noted previously, 3D modeling for 3D printing requires thorough planning. A key consideration in this project was arranging the user interface, including the 20x4 LCD display, buttons, and coin acceptor.
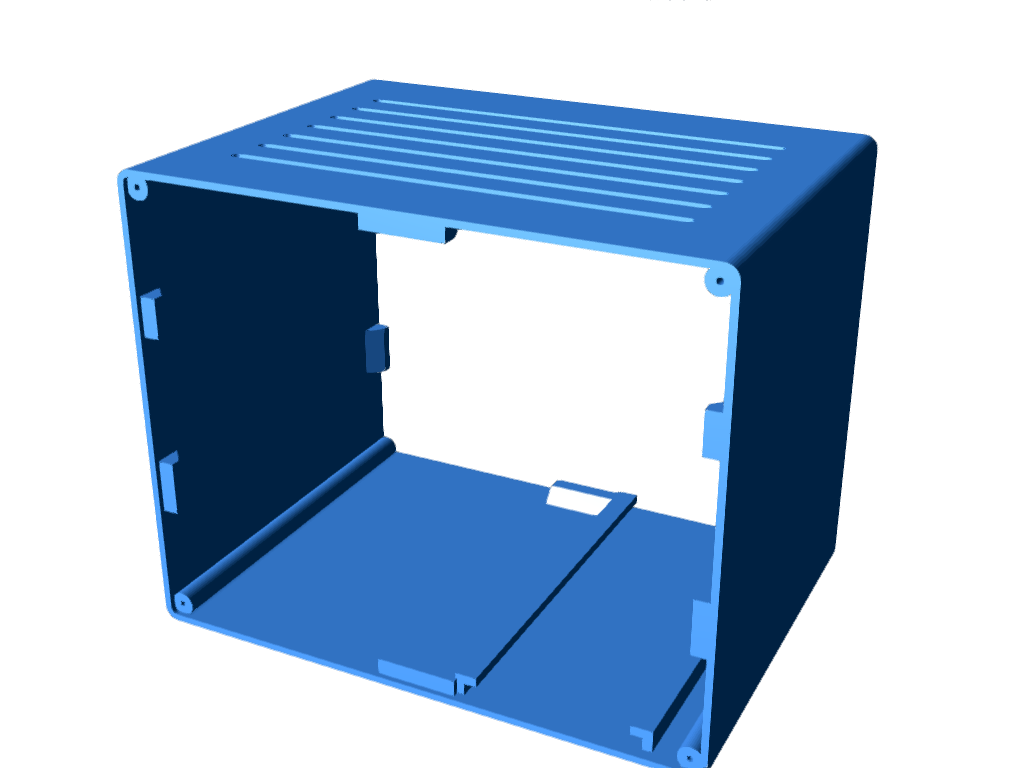
Carefully planning the user interface is essential in the design stage. Observe the internal structure; each component is arranged for ease of access and handling, facilitating connections between them. Below is the internal layout.

The assembly analysis phase is crucial during the 3D modeling process. It allows for evaluating the assembly sequence, helping to reduce the likelihood of errors in the 3D printing stage.
This approach simplifies part manufacturing, shortens the time needed for correcting modeling errors, and lowers production costs associated with modeling inaccuracies. By thoroughly conducting these steps, we successfully manufactured the structure without errors, utilizing testing and analysis tools in the 3D modeling software.
3D Printing Device
From the 3D modeling we 3D print each part of the project. Below we present the result of the 3D printing.

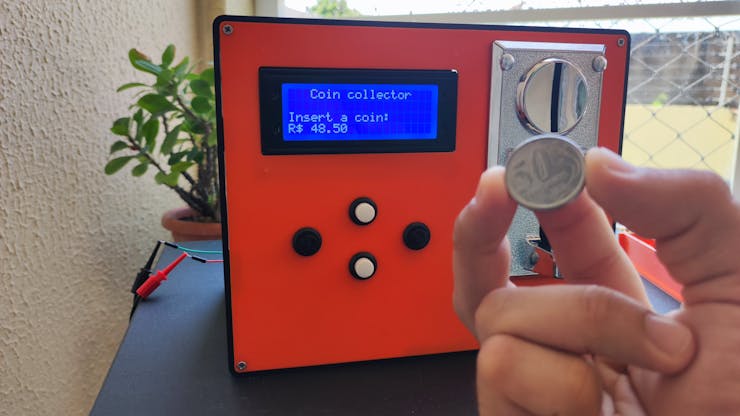
The electronic enclosure structure pictured above required an average of 15 hours to complete the print. For many users, the greatest concern is making mistakes when printing large components. However, with thorough 3D modeling and careful design analysis beforehand, these risks can be significantly reduced. Below, you can see the system in action, counting coins.
Anyone can have parts printed using a 3D printer, even without owning one at home.
With advancements in 3D printing technology and the rise of industrial 3D printers, manufacturing and material costs have dropped significantly. Today, industrial 3D printing allows for parts that closely resemble those made with injection molding.

3D printing enables the creation of enclosures that not only safeguard electronic components but also enhance the ergonomics and aesthetics of the final product, boosting its market appeal.
The capability to customize every aspect of the enclosure allows products to be tailored to specific customer requirements, making them unique and distinct from competitors.
Electronic Structure Resulting from the Project with 3D Printing
3D printing allows for the creation of enclosures that not only protect electronic components but also enhance the ergonomics and aesthetics of the final product, thereby increasing its market appeal.
The capability to customize every detail of the enclosure enables products to be designed to meet specific customer needs, making them unique and setting them apart from the competition.
Below, we present the internal structure of the coin collector. As illustrated, the system comprises an electronic coin acceptor, a 20x4 LCD display, and a shield board for connecting all the cables to the Arduino UNO.

As you can observe, all components have been accurately fitted into the structure as designed during the 3D modeling phase, resulting in a satisfactory outcome.
There are various types of electronic fastening elements available, including glue, threaded fittings, and screw fasteners. With 3D printing, you can bring your ideas to life! Start today! Imagine transforming that concept in your mind into reality.
Using the electronic connections, we developed the code below. Its purpose is to read the pulses from the coin acceptor and display the total value of the coins placed in the machine.
#include  <Arduino.h>
#include <Wire.h> //Biblioteca de Comunicacao I2C
#include <LiquidCrystal_I2C.h> //Biblioteca I2C do LCD 16x2

LiquidCrystal_I2C lcd(0x27,20,4);  // Configurando o endereco do LCD 16x2 para 0x27

// variable use to measuer the intervals between impulses
int  time = 0;
// Number of impulses detected
int impulsCount=0;
// Sum of all the  coins inseted
float total_amount=0;

void setup() {
 pinMode(2, INPUT_PULLUP);
  Serial.begin(9600);
 // Interrupt connected  to PIN D2 executing IncomingImpuls function when signal goes from HIGH to LOW
  attachInterrupt(0,incomingImpuls, FALLING);
    lcd.init();                      //Inicializacao do LCD
  lcd.backlight();
    lcd.clear();

  lcd.setCursor(3,0);
  lcd.print("Coin collector");
  lcd.setCursor(0,2);
  lcd.print("Insert a coin:");
  lcd.setCursor(0,3);
  lcd.print("R$ ");
  lcd.setCursor(3,3);
  lcd.print(total_amount);
   delay(2000);
}

void incomingImpuls()
{
  impulsCount=impulsCount+1;
  time=0;
}

void loop() {
  time=time+1;

  if (time>=30  and impulsCount==5){
    total_amount=total_amount+0.5;
    lcd.setCursor(0,3);
    lcd.print("                ");
    lcd.setCursor(0,3);
    lcd.print("R$ ");
    lcd.setCursor(3,3);
    lcd.print(total_amount);
  Serial.print(" Total:");
  Serial.println(total_amount);
    impulsCount=0;
  }

   if (time>=30 and impulsCount==4){
    total_amount=total_amount+1;
    lcd.setCursor(0,3);
    lcd.print("                ");
    lcd.setCursor(0,3);
    lcd.print("R$ ");
    lcd.setCursor(3,3);
    lcd.print(total_amount);
  Serial.print(" Total:");
  Serial.println(total_amount);
    impulsCount=0;
  }

  if(time>15 && (impulsCount<4||impulsCount>5))
  {
    impulsCount=0;
  }

  delay(15);
}
The above code is intended to detect coins from two different types of pulses. The pulse detection system is based on the principle of interrupts in Arduino.


The following condition is utilized to identify when the user has inserted a 1 real coin. Upon the insertion of a 1 real Brazilian coin, the system registers 4 pulses from the coin acceptor.


As demonstrated, the system accurately detects and computes the value of each currency entered. From this point, we can extend the functionality to other applications, allowing for the creation of a product release system that activates when a user inserts a specified amount of money.
Thanks to 3D printing, we were able to assemble the complete structure and develop a prototype of a product solution for a future market sales strategy.
You can begin today and transform any idea you have into reality, creating innovative products that make a significant impact on your customers with a professional visual presentation made possible by industrial 3D printing.
Conclusions and acknowledgements
We would like to extend our heartfelt thanks to Justway for their outstanding support and innovation in the 3D printing community. If you’re ready to bring your ideas to life, we invite you to create an account today!
#include <Arduino.h>
#include <Wire.h> //Biblioteca de Comunicacao I2C
#include <LiquidCrystal_I2C.h> //Biblioteca I2C do LCD 16x2
LiquidCrystal_I2C lcd(0x27,20,4); // Configurando o endereco do LCD 16x2 para 0x27
// variable use to measuer the intervals between impulses
int time = 0;
// Number of impulses detected
int impulsCount=0;
// Sum of all the coins inseted
float total_amount=0;
void setup() {
pinMode(2, INPUT_PULLUP);
Serial.begin(9600);
// Interrupt connected to PIN D2 executing IncomingImpuls function when signal goes from HIGH to LOW
attachInterrupt(0,incomingImpuls, FALLING);
lcd.init(); //Inicializacao do LCD
lcd.backlight();
lcd.clear();
lcd.setCursor(3,0);
lcd.print("Coin collector");
lcd.setCursor(0,2);
lcd.print("Insert a coin:");
lcd.setCursor(0,3);
lcd.print("R$ ");
lcd.setCursor(3,3);
lcd.print(total_amount);
delay(2000);
}
void incomingImpuls()
{
impulsCount=impulsCount+1;
time=0;
}
void loop() {
time=time+1;
if (time>=30 and impulsCount==5){
total_amount=total_amount+0.5;
lcd.setCursor(0,3);
lcd.print(" ");
lcd.setCursor(0,3);
lcd.print("R$ ");
lcd.setCursor(3,3);
lcd.print(total_amount);
Serial.print(" Total:");
Serial.println(total_amount);
impulsCount=0;
}
if (time>=30 and impulsCount==4){
total_amount=total_amount+1;
lcd.setCursor(0,3);
lcd.print(" ");
lcd.setCursor(0,3);
lcd.print("R$ ");
lcd.setCursor(3,3);
lcd.print(total_amount);
Serial.print(" Total:");
Serial.println(total_amount);
impulsCount=0;
}
if(time>15 && (impulsCount<4||impulsCount>5))
{
impulsCount=0;
}
delay(15);
}
Coin Register IOT for Vending Machine
*Justway community is a shared platform and we are not responsible for any design issues.
- Comments(0)
- Likes(0)
- 0 USER VOTES
- YOUR VOTE 0.00 0.00
- 1
- 2
- 3
- 4
- 5
- 6
- 7
- 8
- 9
- 10
- 1
- 2
- 3
- 4
- 5
- 6
- 7
- 8
- 9
- 10
- 1
- 2
- 3
- 4
- 5
- 6
- 7
- 8
- 9
- 10
- 1
- 2
- 3
- 4
- 5
- 6
- 7
- 8
- 9
- 10


